Homeregis
Adjustable DC Buck Boost Converter, High-Efficiency Power Module, 0-36V 6A
Adjustable DC Buck Boost Converter, High-Efficiency Power Module, 0-36V 6A
Couldn't load pickup availability
XYS3606W Custom CNC Shell provides intricate tuning to your device. Let’s dive into the specifics.
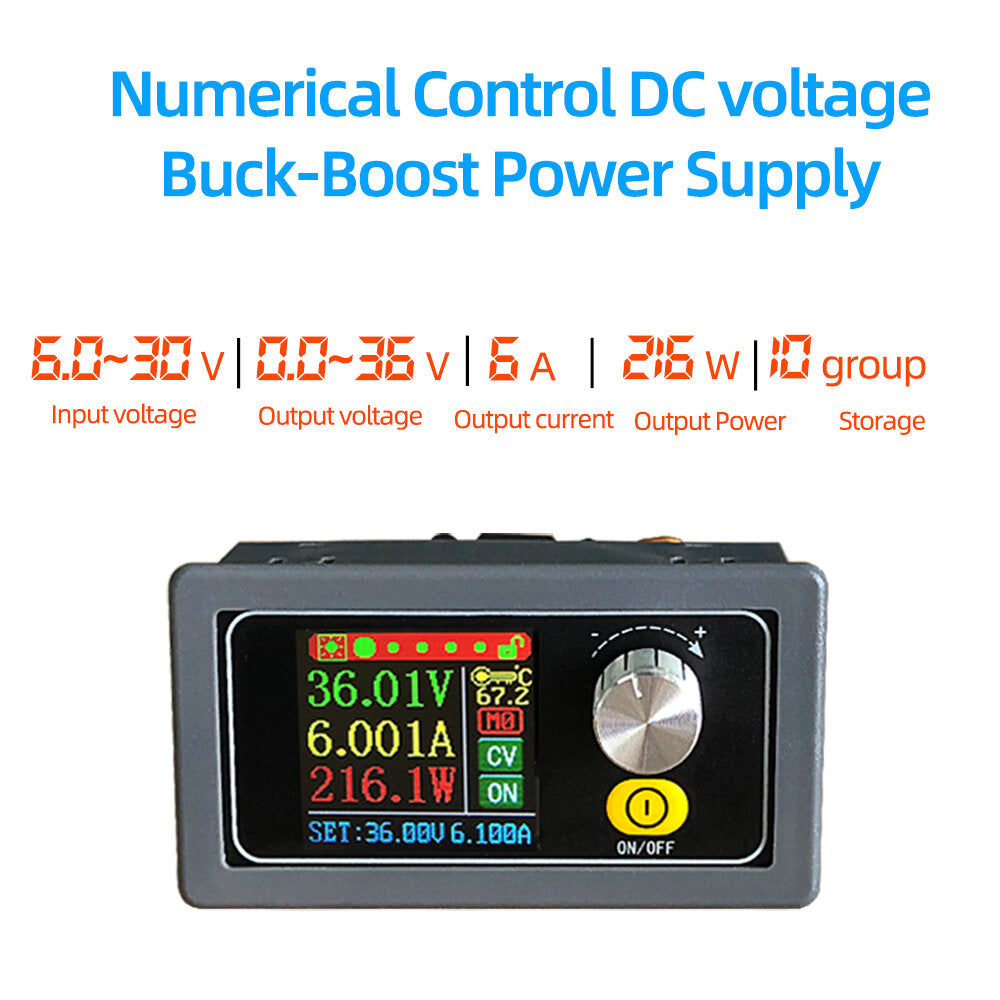
The shell takes an input voltage ranging from 6.0 to 30V, which it converts to an output voltage anywhere from 0.0 to 36V. This powerful shell can handle an output current of 6A and a dazzling output power of 216W. Its versatility is further highlighted by its storage capacity, which can hold 10 groups of settings.
But enough with the numbers, let’s take a look at how to command this technological marvel.
Click the ON/OFF button for a brief moment to control the power output. Hold the same button for 2 seconds to access the screen rotation feature and see your device from a new perspective – it can be rotated in four different directions grouped by 360°.
The rotary encoder potentiometer simplifies page turning. Tapping on the code potentiometer button activates the parameter one wishes to alter, such as voltage or current. You can seamlessly toggle between full and bit selection modes using the same button.
Once the proper setting is selected, within 6 seconds your changes get saved automatically to ensure contacts aren’t disrupted by accidental touches.
Moreover, you can manage parameters and clear them by simply using the code potentiometer button and rotary encoder. Also, it allows you to pause or start recording with a simple click.
Further, it facilitates storing 10 separate data groups (M0-M9), with M0 set as default. Long pressing the code potentiometer button allows quick access to group M1/M2.
Lastly, the shell incorporates a range of safety measures. It provides under-voltage protection (default: 4.0V), over-voltage protection (default: 37V), over-current protection (default: 6.2A), and over-power protection (default: 220W) to ensure a safe user experience.
To help you connect, i.e., pair with the wifi module, the CNC Shell has an intuitive button-based system. Simply click the code potentiometer button, use the rotary encoder to select the pairing mode and you are good to go. After 6 seconds of inactivity or a 2-second long press on the button, the wifi module is set to configure the network according to your preference.
Intricacies of the shell can be seen in the gallery. Enjoy!


